|
|
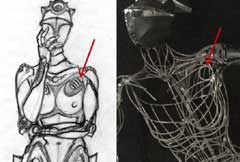 |
Semi-perm molds or plaster waste molds are a type of metal casting mold somewhere in-between sand casting and investment casting. A metal casting plaster is formed in parts around a solid positive tool. In this case I'm using silicone rubber tooling, but various other materials can be used depending on the casting project. A benefit of rubber tooling is that you can have undercuts and still remove them from the sometimes fragile plaster. This casting will be for an intake vent cover on the Girl-5 robot. |
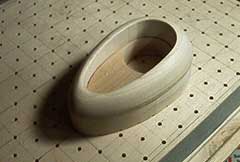 |
I started with a wood positive which you see here sitting on my vacuum table. I cover vacuum forming briefly here but will go into greater detail in another experiment. |
 |
The wood positive is made up of two pieces of poplar that are sanded smooth and grooved underneath to help the air pressure distribute equally around the model. |
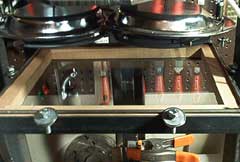 |
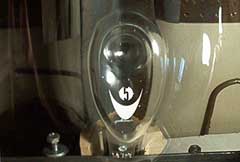
1/8 inch plex doesn't form very well as it has a higher melting point and more shape memory than thinner material or other thermoplastics, but I intend to use those disadvantages to my benefit in this case. You can see it here mounted in the pressure frame under the heating element. |
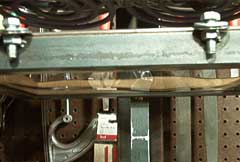 |
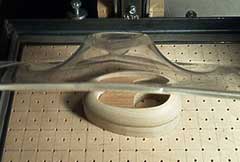
This is a shot from underneath as the plex starts to soften from the heat. |
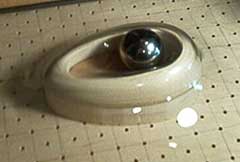 |
Once the plex reaches a certain temperature I slide the pressure frame down around the model and turn on the vacuum. The vacuum isn't strong enough to pull it down in the middle so I help it along by pushing a big bearing into it. I don't want it completely tight to the model in this case because I'm counting on the stretch of the plastic to form an aerodynamic shape that would have required a more elaborate model. |
 |
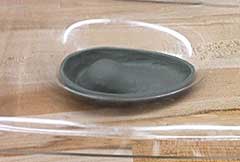
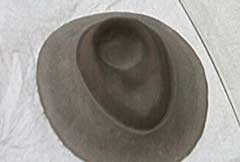
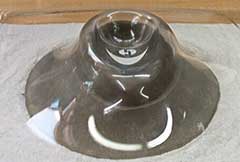
Here is a side view of the formed part. You can see how the tension of the plastic helps to give it a smooth shape. |
 |
Then I slap a logo of cut film on the inside. The thickness of the film will cause an embossed logo on the final casting. |
 |
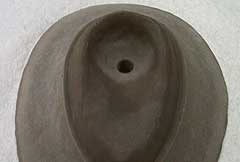
Here you see a even clay sheet pushed into the top of the mold. This will be the back side of the casting. |
 |
Sections of a casting that are thicker than the rest are slower to cool and the last areas to solidify. If this were poured as a solid piece the middle would be much thinner that the rest and I'd get hot spots toward the back of the vent. It would probably have defects. |
 |
This is what it looks like from the top with the clay. |
 |
The back side of the mold is poured with a quick set cement. I would probably pour it in a two part urethane if this was a longer run, but cement is a 20th of the cost and works just fine. I also add a filler agent that helps eliminate air bubbles |
 |
The back of the mold removed from the top and clay. |
 |
A hole is drilled through the center while the cement is still a little damp. This hole will let liquid rubber escape when the tooling is poured. |
 |
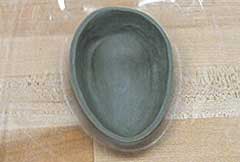
This shot shows the cavity that the liquid rubber will fill. |
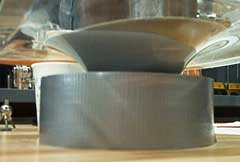 |
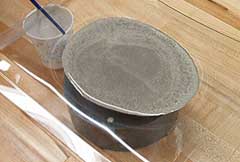
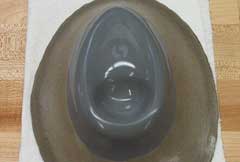
An RTV silicone is poured into the mold top and the mold back is pushed into place. |
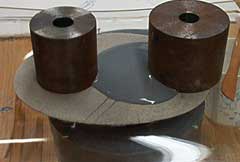 |
Weights keep the mold back from slipping out of register while the silicone cures. Note the silicone that was force out of the drilled hole when the back was pushed into place, Pouring the silicone with this pressure method helps eliminate air bubbles and force the rubber into every crack.
|
 |
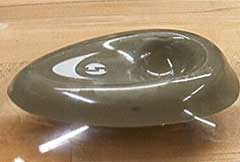
The rubber tool with the mold top removed after curing. The mold back will hold the rubber tool in place when the top half of the plaster mold is poured. |
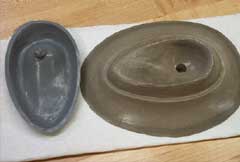 |
The back of the rubber tool with the back of the mold. |
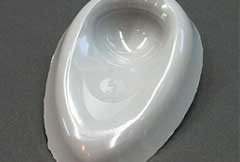 |
The final rubber tool all ready to go to the next step in producing a metal casting. See how even a 2mm film logo showed up in the tool surface. With luck it will reproduce just as well in the metal. I'll be casting the metal part this week and will post the rest of the process. |